Here are the steps to configure SSL on your servers running the Windows Server Update Services. This guide was written using Server 2012 R2, however it should be the same steps for Windows Server 2008 R2 as well. This guide also assumes you have a working instance of WSUS installed and configured, using default ports.
- Login to your WSUS server
- Open up Server Manager
Image may be NSFW.
Clik here to view.
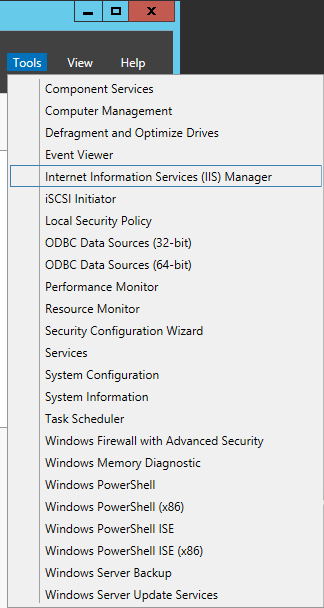
- Select Tools -> Internet Information Services (IIS) Manager
Image may be NSFW.
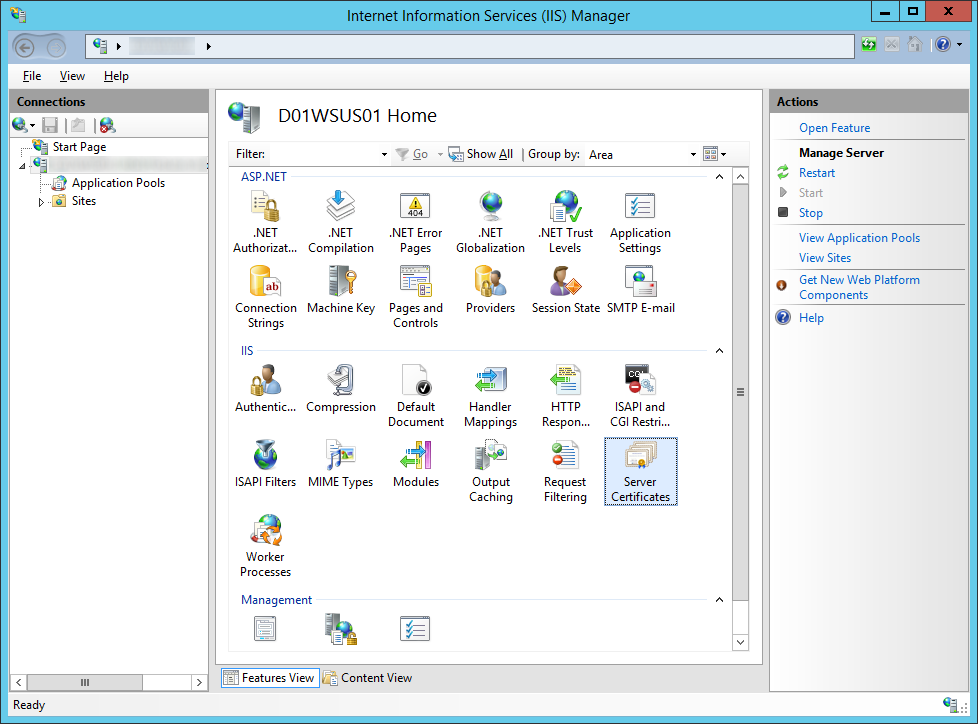
Clik here to view. - Generate a SSL certificate
- Click on your Server and select Server Certificates
Image may be NSFW.
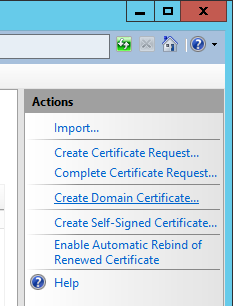
Clik here to view. - If you have your own PKI environment, follow these steps, if not, jump to step three
- Click Create Domain Certificate on the right side
Image may be NSFW.
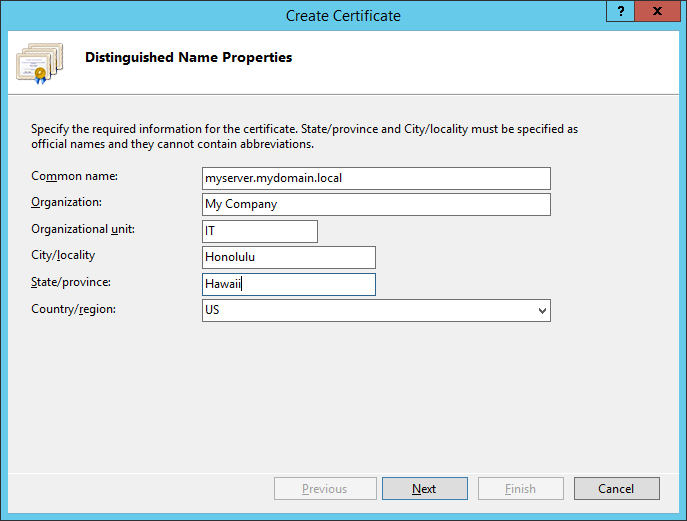
Clik here to view. - Fill in the requested information on the Distinguished Name Properties page and click Next
Image may be NSFW.
Clik here to view.
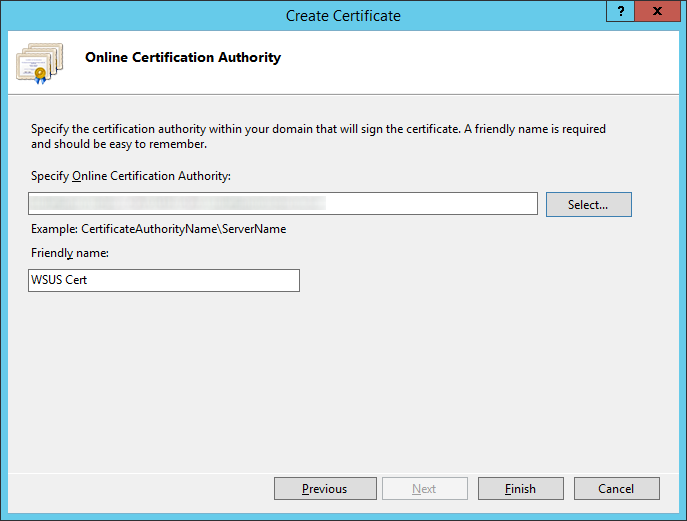
- Select your certificate authority and enter a friendly name (this can be anything), and then click Finish
- Image may be NSFW.
Clik here to view.
- Click Create Domain Certificate on the right side
- If you need to submit a certificate request to an external certificate authority like Goaddy, Verisgn, Comodo; follow these steps
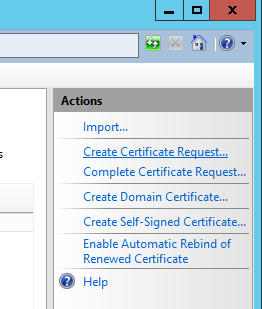
- Click Create Certificate Request on the right side
Image may be NSFW.
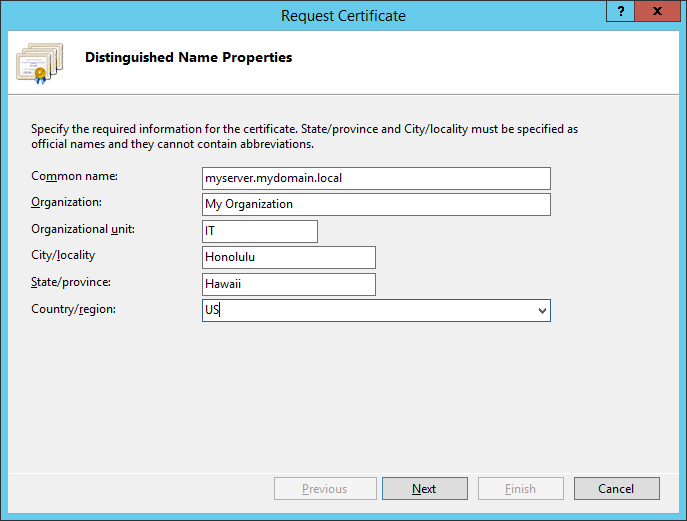
Clik here to view. - Fill out the Distinguished Name Properties and click Next
Image may be NSFW.
Clik here to view. - Change the Bit length to 2048 and click Next
Image may be NSFW.
Clik here to view.
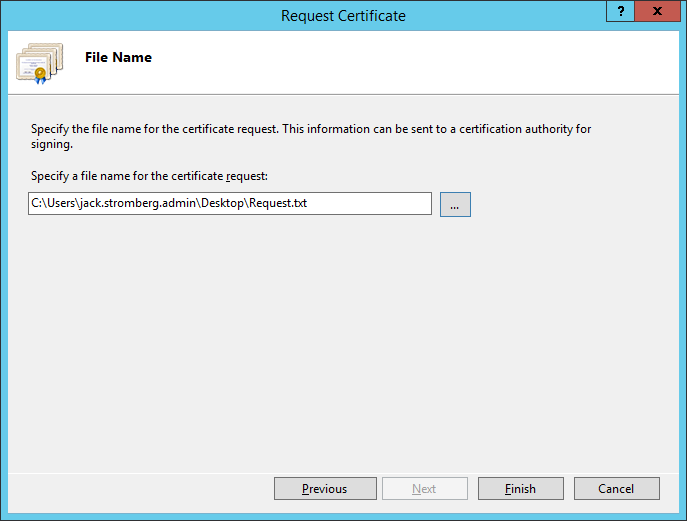
- Select a location on where to place the CSR file that will be generated by the wizard and click Finish
Image may be NSFW.
Clik here to view. - At this point, send the request to your certificate authority (like GoDaddy, Verisign, or your own internal certificate authority). You should receive back a .cer file once the claim has been fulfilled.
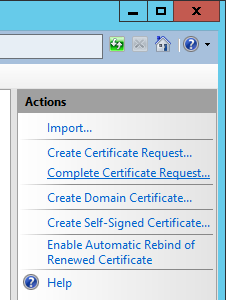
- Click on Complete Certificate Request on the right side
Image may be NSFW.
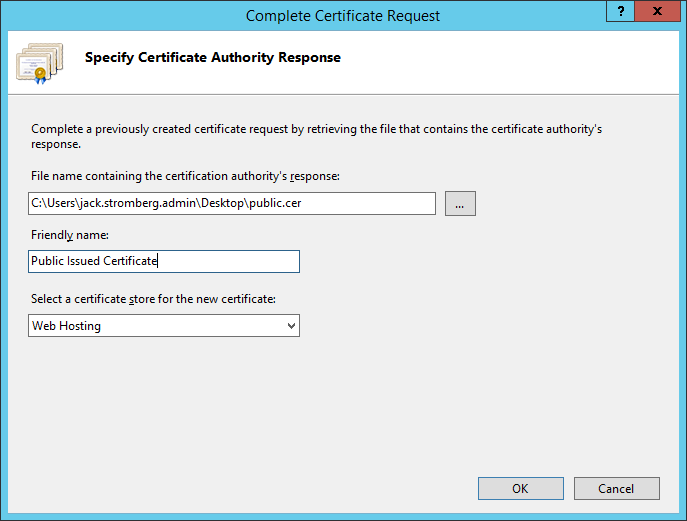
Clik here to view. - Select the .cer file that your public certificate authority provided you, type in a friendly name (this can be anything), select Web Hosting for the certificate store, and click OK
Image may be NSFW.
Clik here to view.
- Click Create Certificate Request on the right side
- Click on your Server and select Server Certificates
- Next, we need to bind the SSL certificate to your network adapter.
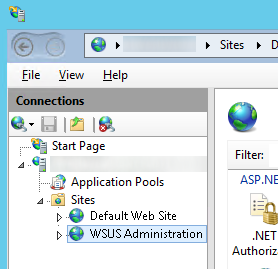
- Expand your server, expand Sites, and select WSUS Administration
Image may be NSFW.
Clik here to view.
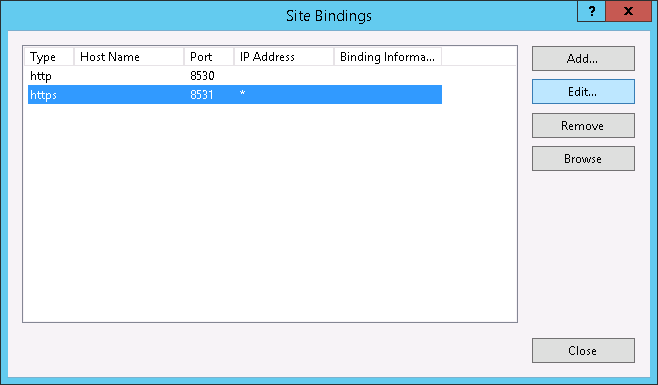
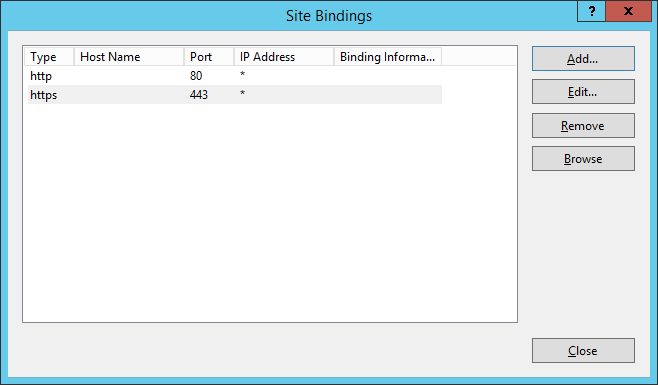
- Select Bindings… on the right side
Image may be NSFW.
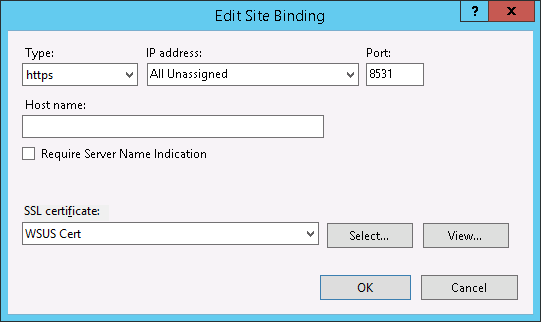
Clik here to view. - Select the https site and hit the Edit… button
Image may be NSFW.
Clik here to view. - Select https for the type, select the SSL certificate you created above, and click OK
Image may be NSFW.
Clik here to view. - Click Close on the Site Bindings window
Image may be NSFW.
Clik here to view.
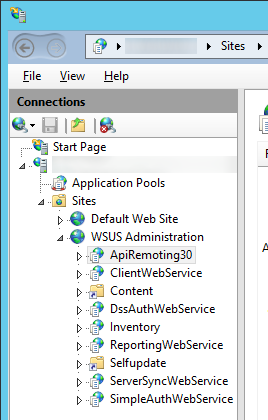
- Expand your server, expand Sites, and select WSUS Administration
- Next, we need to enforce SSL encryption on the following virtual roots
• ApiRemoting30
• ClientWebService
• DSSAuthWebService
• ServerSyncWebService
• SimpleAuthWebService- Expand WSUS Administration and foreach of the directories above, complete the following steps
- Select the virtual site
Image may be NSFW.
Clik here to view.![IIS - WSUS Administration]()
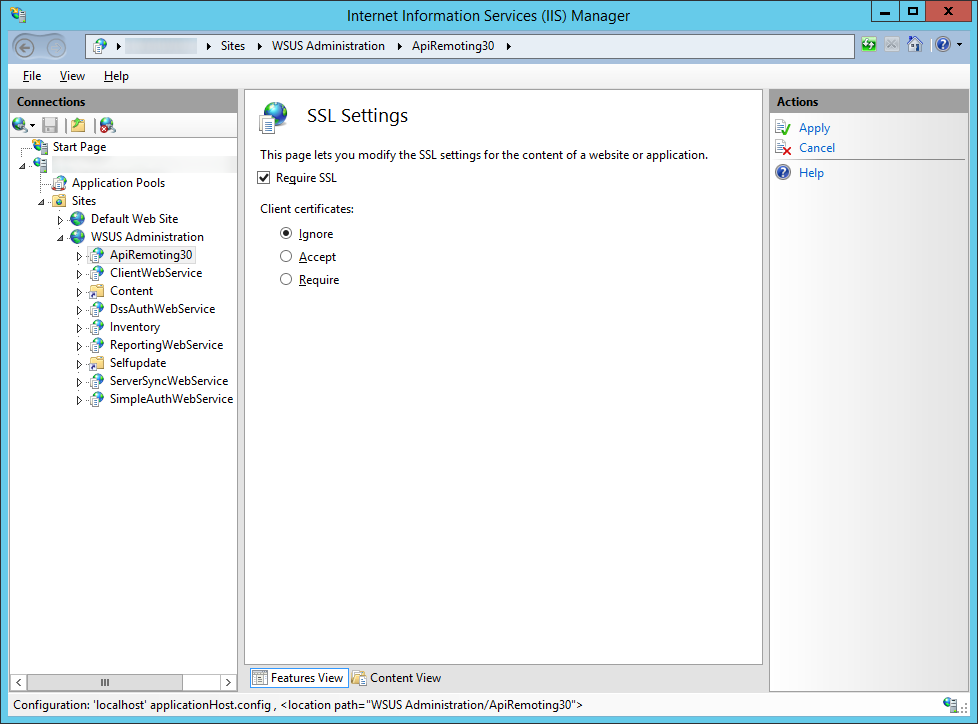
- Double click on SSL Settings
Image may be NSFW.
Clik here to view.![IIS - WSUS Administration - SSL Settings]()
- Check Require SSL and leave client certificates to ignore
Image may be NSFW.
Clik here to view.![IIS - WSUS Administration - SSL Settings - Require SSL]()
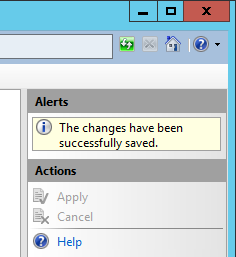
- Click Apply in the top right corner
Image may be NSFW.
Clik here to view.![IIS - SSL Settings - Apply]()
- Select the virtual site
- Expand WSUS Administration and foreach of the directories above, complete the following steps
- Next, we need to execute a command to tell WSUS to use ssl
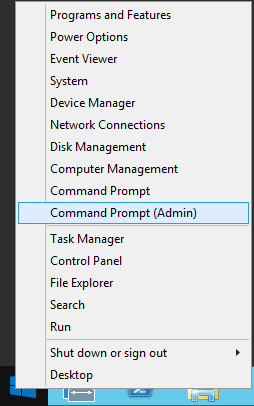
- Open up an elevated command prompt
Image may be NSFW.
Clik here to view.![Server 2012 - Administrative Command Prompt]()
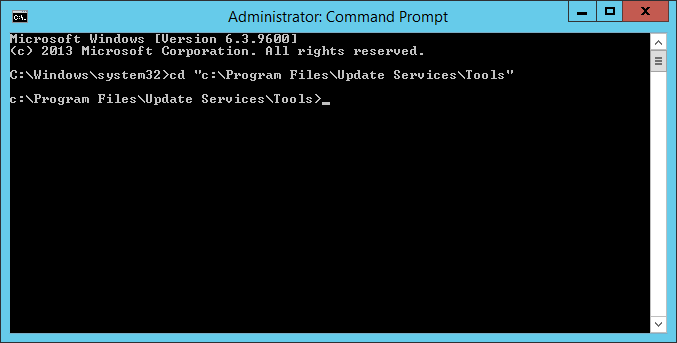
- Navigate to your WSUS installation folder
- cd “c:\Program Files\Update Services\Tools”
Image may be NSFW.
Clik here to view.![cmd - program files - update services - tools]()
- cd “c:\Program Files\Update Services\Tools”
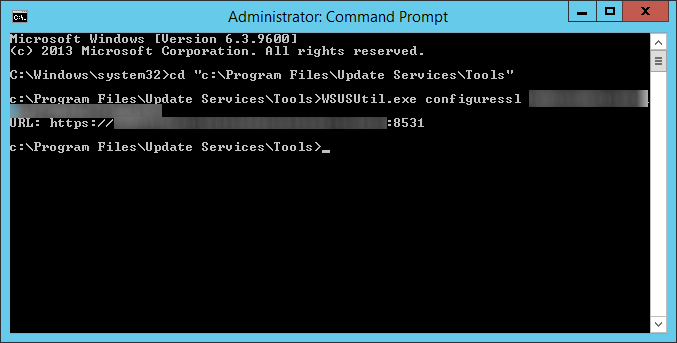
- Execute the following command (replace your server with the correct FQDN)
- WSUSUtil.exe configuressl myserver.mydomain.local
Image may be NSFW.
Clik here to view.![wsusutil configuressl]()
- WSUSUtil.exe configuressl myserver.mydomain.local
- Open up an elevated command prompt
- Restart the WSUS server to make sure all changes take effect. You should be able to bring up the WSUS management console if all went well.
- Configure your clients to connect via SSL to the WSUS server via Group Policy
- Login to your domain controller
- Open up Server Manager
Image may be NSFW.
Clik here to view.![Server 2012 R2 - Server Manager]()
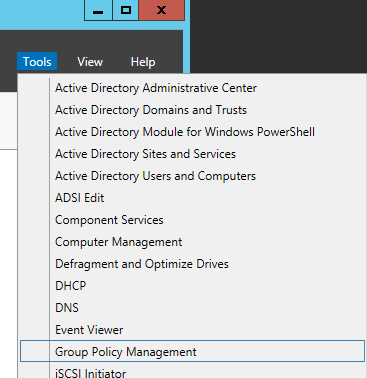
- Open up Group Policy Management
Image may be NSFW.
Clik here to view.![Server Manager - Tools - Group Policy Management]()
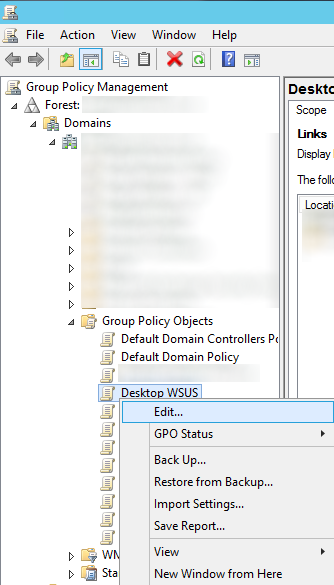
- Right click on the policy you want to edit and select Edit
Image may be NSFW.
Clik here to view.![Edit GPO]()
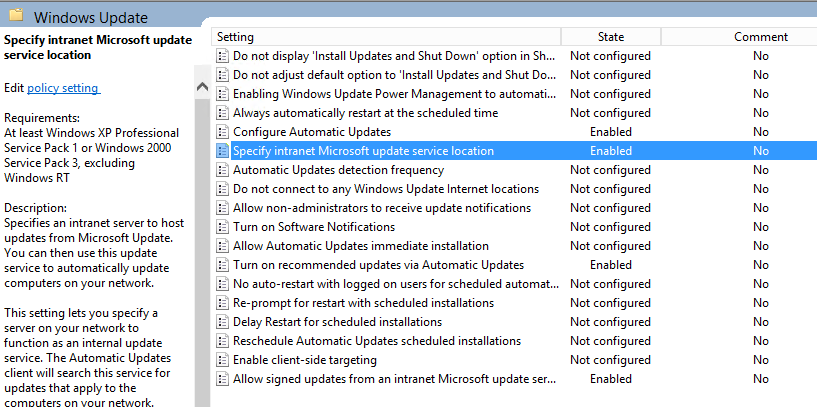
- Expand Computer Configuration -> Polices -> Administrative Templates -> Windows Components -> Windows Update
- Double click on Specify intranet Microsoft update service location
Image may be NSFW.
Clik here to view.![Specify intranet Microsoft update service location]()
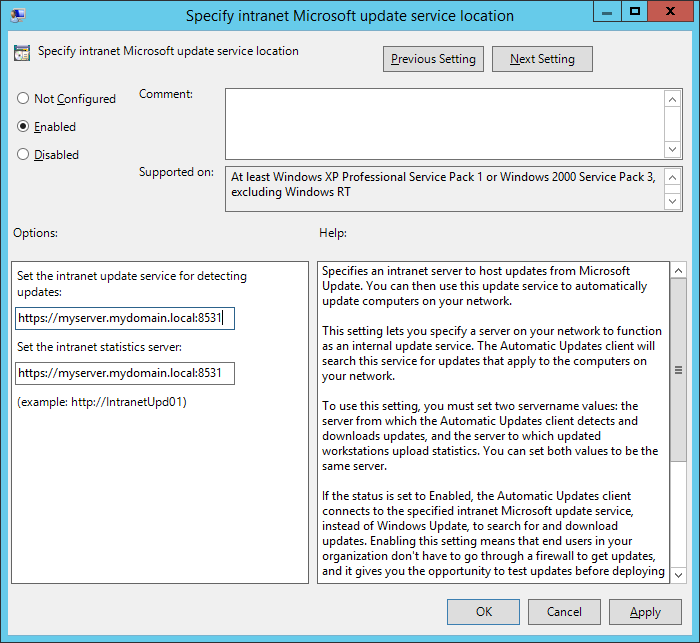
- Change the intranet update service url to https and specify port 8531 and then click Apply.
Image may be NSFW.
Clik here to view.![Specify intranet Microsoft update service location - options]()


That should do it! Try doing a gpupdate /force on your local machine and the check for windows updates. If windows successfully completes checking for updates, you should be good to go! Image may be NSFW.
Clik here to view.
Notes: Official documentation from Microsoft in regards to using SSL and WSUS can be found here: http://technet.microsoft.com/en-us/library/hh852346.aspx#consswsus